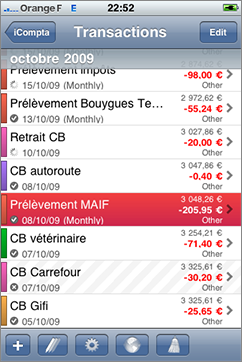
Main screen
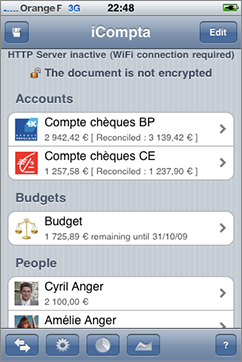
The accounts list displays the accounts of the document with their icon and their balance.
The first value under the name of an account indicates its real balance and the second one indicates the bank balance (only the reconciled transactions are considered).
The budgets list displays the budgets of the document with their icon and their remaining amount.
Budgets are used to track your income and expense on a periodic basis.
The people list displays the people of the document with their icon, their money and their overall situation with other people.
People are in fact special accounts where you can add transactions that you don't want to add in one of the accounts of the document and are mainly used in shared transactions management.
The money of a person is the sum of the balances of the accounts where he is the owner or co-owner (the balances of the accounts with a co-owner are divided by 2).
Selecting and editing
When you are not in editing mode, you can touch an account or a person to show its transactions and you can touch a budget to display its reports. When you are in editing mode, you can touch an account, a person or a budget to edit it.
You can also add, remove and reorder items by activating the editing mode.
Actions
The following actions are available in the toolbar :
- Currencies and categories : shows the currencies and categories screen.
- Transfer : shows the transfer screen.
- Statistics : shows the statistics screen.
- Balance evolution : shows the balance evolution screen.
- ? : shows the user guide.
Account screen
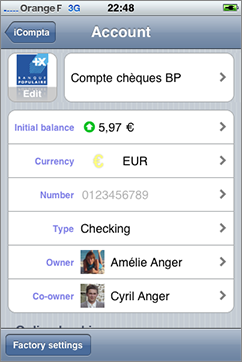
You can edit the name, the icon, the currency, the original balance and add some information about your bank account for online banking.
You can also choose the owner and the possible co-owner among the people of the document (this will be used to compute the money each person has).
Managing credit cards and checkbooks
You can create several credit cards and checkbooks per account.
These informations are meant to be used in the transaction info field in order to precise the kind of an transaction such as the card used in case of a credit card transaction or the number of the check in case of a check transaction.
When you select a checkbook in the completion menu, its next check number is automatically incremented.
Actions
The following actions are available in the toolbar :
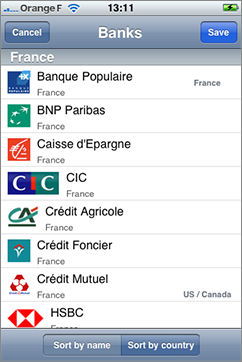
- Factory settings : displays a list of financial institutions which may contain yours in order to fill some settings automatically (icon, online banking address and OFX direct download information for supported financial institutions).
Person screen
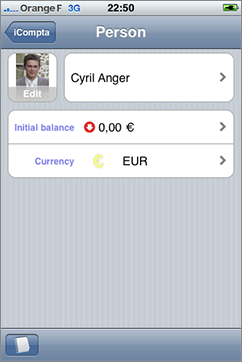
You can edit the name, the icon and the currency.
Actions
The following actions are available in the toolbar :
- Address Book : allows to import the name and icon from a contact.
Transactions screen
Actions
The following actions are available in the toolbar :
- + : shows the new transaction screen.
- Batch change : allows to perform a change on all displayed transactions.
- Preferences : allows to change the sort key and to hide reconciled transactions.
- Download transactions : attempts an OFX direct download.
- Online banking : shows the web site of your bank.
- Situations : shows the situations screen.
- Clean transactions : you can remove transactions older than a certain number of months.
Add a transaction

The new transaction screen allows you to create a new transaction.
Please refer to the following section for an explanation on the different fields.
When you fill the name of the new transaction, iCompta searches the last transaction having the same name and let you copy its values to avoid entering them again. You can do that by touching the blue button located on the right of the matching transaction.
Situations
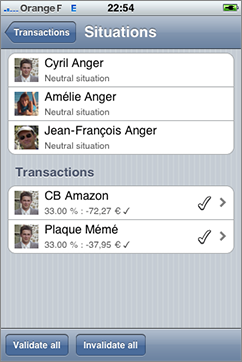
The situations screen displays the situation of the current person with the other persons as well as each transaction the current person participated in.
Transaction screen
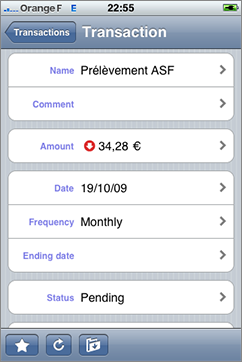
The description line displays the description of the transaction.
The date line displays the date when the transaction occurred.
The frequency line allows you to make a repeating transaction. You can either create the next occurrence manually or wait for it to be created automatically by iComptaMobile. When the new occurrence is created, the frequency of the previous transaction is restored to none and as there is no link between the 2 transactions, modifying one won't affect the other.
The ending date line displays the date when the repeating transaction ends.
The amount line displays the amount of the transaction. You can touch the left arrow to switch between credit and debit where you are in the edit screen.
The kind line lets you choose the kind of transaction.
The info line lets you specify the number of the check or the credit card used for the transaction.
The status line displays the status of the transaction. Canceled transactions are not considered when computing account balance and statistics and can be useful if you want to remember that you made a cancelled check as security for example.
The reconciled date line displays the date when the transaction was effectively credited or debited on your account.
The comment line displays an optional comment about the transaction.
The categories section allows you to tag the transaction with one or more categories.
The participants section displays the people other than you involved in the transaction.
Managing shared transactions
Shared transactions are used to help solving the common problem of who owes what to who when you buy things with people.
In order to accomplish this, you can set the amount or the percentage of participation in an transaction for each person of the document.
The checkbox on the right is used to indicate when the loaner has been refund.
For example, if you make a trip with some friends, sharing all charges, and you want to know the situation at the end of the trip :
- you start by creating the people corresponding to your friends and you add transactions in their newly created accounts for what they have paid
- you add your own expenses either in your accounts or in your person account
- then you have to edit the percentage of participation for each transaction (if you were 4 and you shared equally, you will enter 25% for each person)
- you will then know everyone's debts in the situations board
- when people start to pay their debts, you can check the refund button for the people and the transactions concerned in order to update the situations
Actions
The following actions are available in the toolbar :
- Highlight / unhighlight : you can highlight or unhighlight current transaction.
- Create next occurrence : you can force the creation of the new occurrence of a repeating transaction.
- Duplicate : you can duplicate the current transaction.
- Move : you can move the current transaction into a different account.
Budget screen

You can edit the name, the icon and the currency.
When you create a new budget, you have to choose the related accounts, its duration, its start date, possibly its end date and the budgeted amount for each category.
For example, if you want to create a monthly household budget :
- you start by creating a new budget and setting its duration to one month
- you choose its start date, for example 12/01/08
- if you want the budget to start over every month, you do not set an end date
- then you choose the related accounts, for example your main account
- last you can add categories in the categories section, for example "Wage" 1200$ credit, "Shopping" 800$ debit, "Car" 200$ debit, "Rent" 500$ debit, etc.
- now when you add transactions in the related accounts, you can follow the situation compared to budgeted income and expense in the reports screen
Actions
The following actions are available in the toolbar :
- Budget breakdown : shows the budget breakdown screen.
Budget breakdown
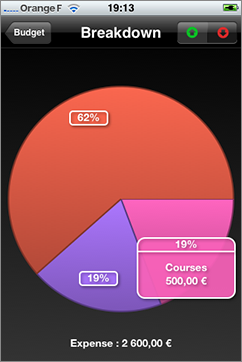
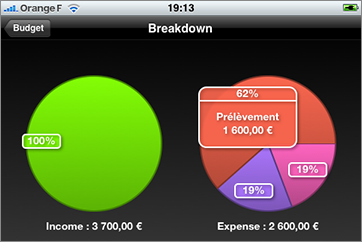
The budget breakdown screen will display the part of each category in the budget incomes or expenses as a pie diagram. You can click on a percentage to display more information.
Report screen
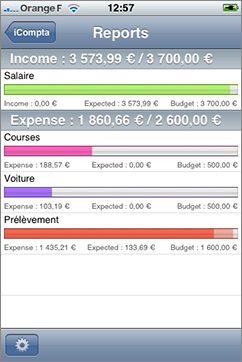
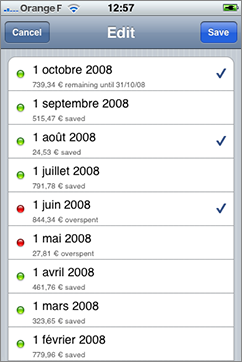
You can display the list of reports by pushing the settings button in the toolbar. You can then select one or more dates to see whether or not you fit in your budget.
Currencies and categories screen
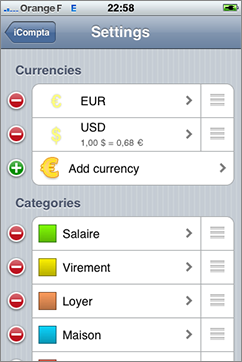
The currencies list displays the currencies of the document with their icon and their change rate.
The main currency is the first one on the list and the change rate of the other currencies is based on this currency.
For example if the main currency is euro, its change rate 1 and if $1 = €0.64 then the dollar's change rate will be 0.64.
The categories list displays the categories of the document with their icon.
Transfer screen
![]()
This screen allows to create automatically two transfer transactions in the selected accounts with the desired amount, category and frequency.
Statistics
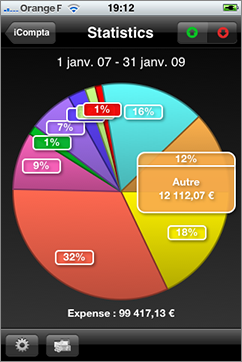
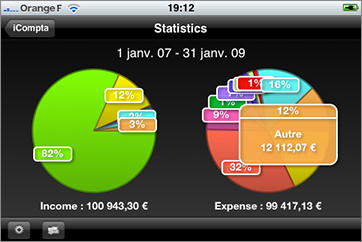
The statistics screen displays the part of each category in your global incomes or expenses as a pie diagram. You can click on a percentage to display more information.
You can push the preferences button to change the statistics period and choose to include transfers or not.
You can push the accounts button to change the selected accounts.
Balance evolution
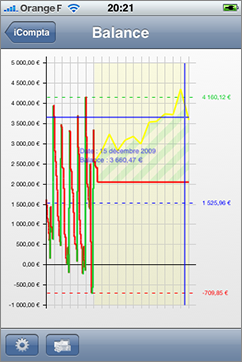
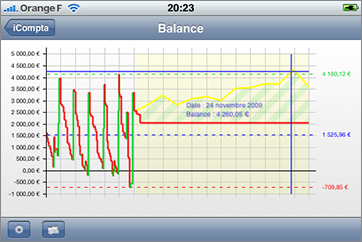
The graph shows monthly evolution of the balance of selected accounts in the selected date range.
When the balance raises, the line is green and when it lowers the line is red.
The dashed lines indicate, the minimum balance, the maximum balance and the average balance during the date range.
A transparent yellow layer is drawn after today's date and the yellow line shows a forecast of the balance based on the average income and expense of previous months (you can choose to use a budget instead if you prefer).
When the forecast is lower than the current future balance, the area between the two lines is hatched in red and when the forecast is greater, the area is hatched in green.
By default, the next occurrences of periodic transactions are not included in the graph but you can choose to include them by activating the switch in the settings.
When you touch the graph, a blue target is drawn to indicate the date and the balance corresponding to your finger position.
You can push the settings button to change the balance evolution period and modify the options described above.
You can push the accounts button to change the selected accounts.
Synchronization
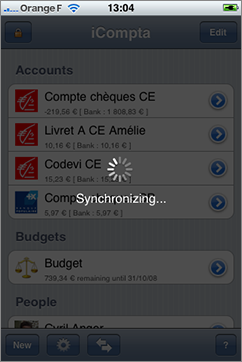
Synchronization with iCompta 3.0+ on Mac.
Please refer to the synchronization section of the Mac version user guide.
Importing and exporting transactions
There are different ways to import your transactions :
- OFX direct download : only with supported financial institutions.
- Embedded server : you download files from your bank or export them from another software on your computer and then you send them to iCompta via a wireless connection.
- Embedded browser : you download files on your bank's web site directly in iCompta.
OFX direct download
You can touch the download button of the transactions screen to start downloading your transactions.
To be able to download transactions, you have to fill OFX direct download information manually or with the factory settings screen and enter your account number, login and password.
If your bank doesn't support OFX direct download, you can import your transactions with the embedded web server or download them with the embedded web browser by connecting to your bank's web site.
Backup / restore and import / export server
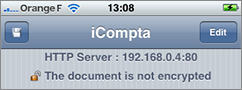
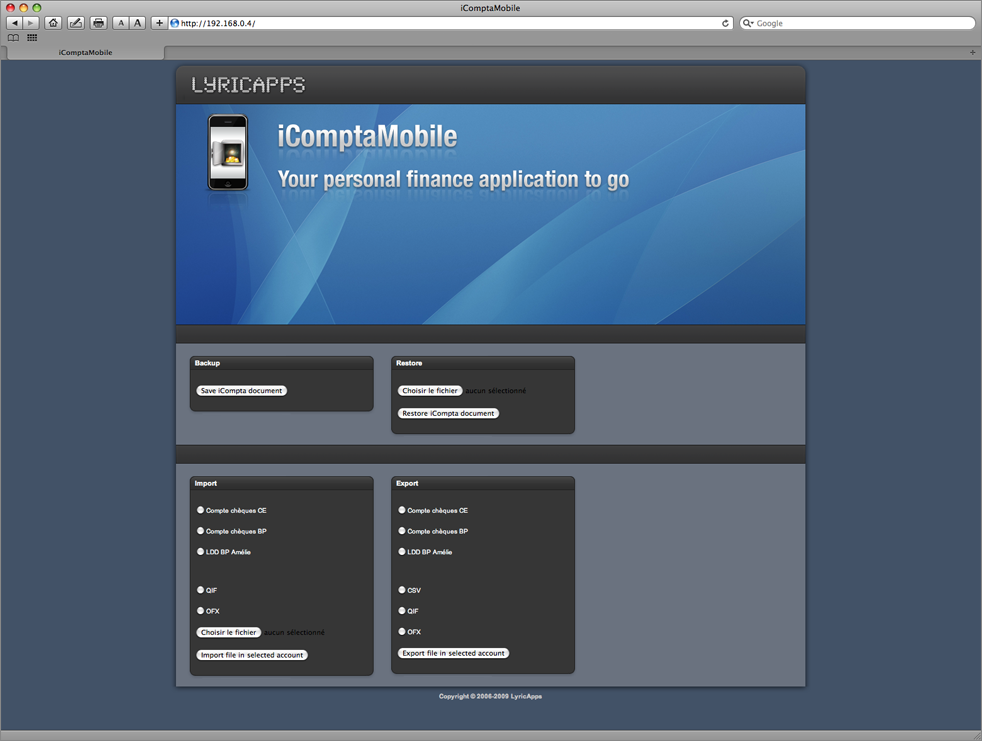
You can connect to the embedded server by entering the address shown at the top of the main screen in your computer's web browser (make sure your computer in on the same wireless network as your iPhone / iPod / iPad).
With this server, you will be able to backup / restore all your accounts and also import / export transactions.
Importing transactions
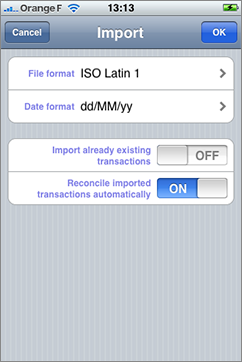
If you choose to import a file a new window with import settings will appear.
The following formats are available for importing accounts :
- QIF : Quicken Interchange Format file.
- OFX : Open Financial Exchange file.
For some import formats, you have to specify the format to use to import dates. It musts be composed of the following elements (be careful with the case) :
- yy or yyyy : The year.
- MM : The month.
- dd : The day.
Note : To import a Microsoft Money QIF file, the format to use is often dd/MM''yyyy.
You can choose to skip already imported transactions (uncheck this preference if you notice that some transactions are not imported).
You can also choose to reconcile imported transactions automatically.
Exporting transactions

If you choose to export a file a new window with export settings will appear.
The following formats are available for exporting accounts :
- CSV : Text file.
- QIF : Quicken Interchange Format file.
- OFX : Open Financial Exchange file.
For some export formats, you have to specify the format to use to import dates. It musts be composed of the following elements (be careful with the case) :
- yy or yyyy : The year.
- MM : The month.
- dd : The day.
Online banking
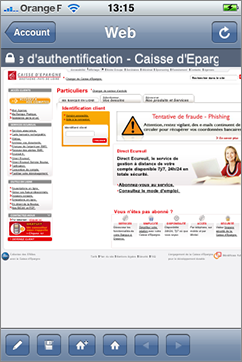
The gray bar gives you information on the current page and the toolbar allows you to control the embedded browser.
If you don't want to fill the login form every time you want to connect, you can do the following :
- Open the web view and fill all the needed fields manually.
- Click the save button to store the values you entered in the fields.
- Next time you will be able to fill the forms automatically by clicking the fill button.
If you download a file which can be imported by iCompta, a new window will appear asking you if you want to import transactions contained in the file in the current account.
Encryption
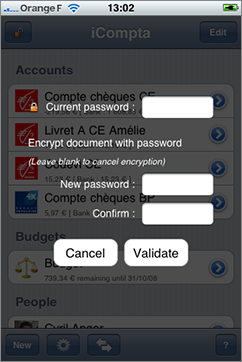
iComptaMobile can encrypt your documents with a password.
Simply push the lock icon at the top left corner of the window and enter your password in the field.
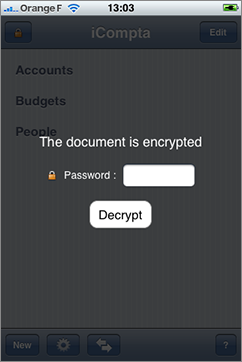
When you open an encrypted document, iComptaMobile will ask your password to decrypt it.
If you make any change then save, the new file will be automatically encrypted.
If you want to save it unencrypted, push the lock icon at the top left corner of the window and leave the new passwords fields empty before clicking on the validate button.
Preferences
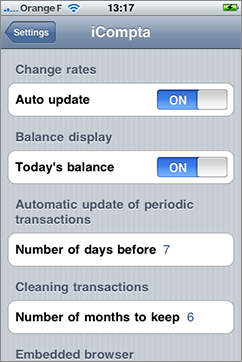
You can access iComptaMobile preferences through Settings application.
Change rates
You can choose to automatically get latest change rates on the Internet.
Balance display
You can choose to display today's balance instead of the sum of all transactions.
Repeating transactions
New occurrences of repeating transactions are automatically created as the new occurrence date approaches.
You can set the number of days before the date of the next transaction to use for creating new occurrences.
Cleaning transactions
You can choose the number of months to keep when cleaning transactions.
Embedded browser
You can choose the user agent of the embedded browser.